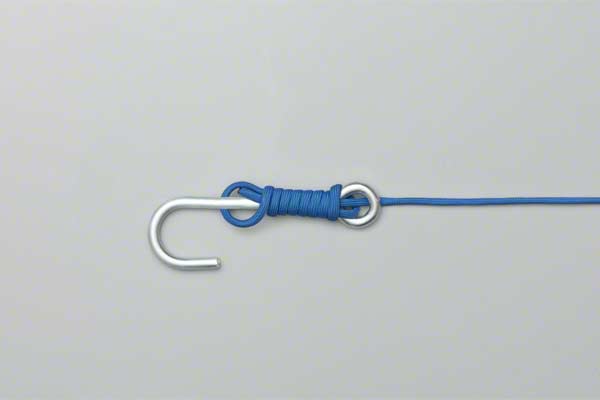
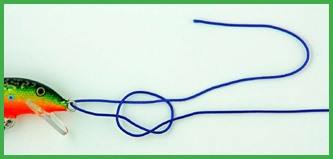
An excellent knot is one thing you can never buy. You have to learn how to tie a fishing hook on your own. While no single knot might satisfy every fishing situation, mastering the art of tying the best angling knots reduces break offs. Moreover, it ensures you fish more as well as retie your line less. You must learn how to tie the knots of different categories (terminal loop knots, light-to-heavy line splices, line-to-line splices, and terminal knots).
The following twenty fishing knots will surely make you versatile in fishing. They will offer you plenty of options when it comes to joining lines, making loops on lures, Snelling, or even getting quick solid knots and stronger connections when in a hurry to get the lure back in water. The best part is that each fishing knot is illustrated perfectly, and has an accompanying video for practical viewing on how to tie. In addition to these knots, check out these other knots that you need to know.
Therefore, remember to bookmark this link for later purposes or better still, share it with your angling colleagues.
More...
Here are the 20 fishing knots you need to know:
#1: The Palomar Knot
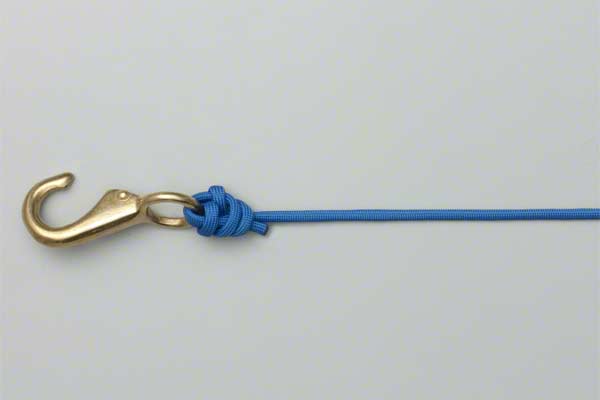
Via: http://www.fishingknots.co.za/
The Palomar is undoubtedly the most used, perhaps the most discussed and the most fundamentally known fishing knot used in fishing. It is very simple to tie. If tied correctly, this knot is highly strong. It works with no crossing. The Palomar knot works with almost every kind of line.
To Tie
To tie the Palomar knot, double your line and pass it through the split ring or hook’s ring. Secondly, tie just a simple
Check out this video :
Or this one to watch how to tie the Palomar knot.
#2: The Improved Clinch
This knot is often called the cinch or clinch or a variation of the two. Maybe it is the simplest and one of the strongest. Many people normally experience slipping of the knot with braid when making it. Fortunately, you can fix the problem by doubling the line.

Via: http://www.animatedknots.com/
To Tie
To tie this knot, start by passing your line through the lure’s or hooks’s eye. After that, wrap the tag end up your main line for not less than five times, in fact 7 times is better. Next, pass the tag end through a tiny opening inside the line under your wrap close to the hook’s eye. Bring it back up via the loop that’s now formed at the knot’s top. That is exactly what assists enhance the clinching/cinching of the knot thus preventing it from slipping easily. Pull the tag end slowly after wetting the line.
Caution: The knot is constantly tightening on itself. Therefore, to prevent the risk of slipping, breaking, or unraveling, avoids cutting much tag end off. It is much better to leave roughly 1/16 inch or even more tag on the knot. To make your knot more slip resistant, double the line prior to tying the knot.
Check out this video on how to tie the Improved Cinch fishing knot:
#3: The Trilene Knot
The Trilene Knot is almost similar to the Improved Clinch. However, it has one variation.
To Tie
Begin by passing the tag end via the hook’s eye. Make a tiny loop and then pass it through again. Wrap your tag end way up the line five to seven times. Take the tag end and pass it via the double loop, which you made at the beginning of your knot. Pull your tag end tight on the moistened line. Doing so enables you to double wrap close to the eye for a better snugness and wear.
Caution: It takes some practice to loop it via the eyelet twice and get back the tag end through the same place after your wraps.
Check out this video on how to tie the Trilene knot :
#4: The Uni Slip Knot
The Uni Slip is an overlooked but powerful knot in fishing. Among many salt-water anglers, the Uni Slip remains a staple
To Tie
Pass the line via the eye as you run it parallel to the chief line. Loop it back down to the eye, which should create a loop. Wrap the tag end upward inside the loop that you created five to seven time. Tightly pull the end tight in order to snug your knot on your line just a little.
Pull the
Notes: Versatility is what defines the Uni Knot. You can always modify in order to join 2 lines together. Moreover, you can double in order to make it twice or thrice as strong.
Find more information on the Uni Slip knot here.
#5: The San Diego Jam Knot
Most people often confuse the San Diego Jam Knot with the Uni Knot because of their wrapping
To Tie
Pass the line via the eyelet and run the tag end parallel to
Learn more about how to tie the San Diego Jam knot here.
#6: The Snell Knot
The Snell knot has been in existence for presenting live bait. However, a decade ago, it gained popularity when anglers discovered its effective nature especially when a hook is pegged and
Via: www.animatedknots.com
To Tie:
Entering the tag end in the eye on the right direction is the key to tying this knot. Hold the hook shank in a manner that it faces up. Pass the line down in the eyelet in the same side the hook is pointing. Doing that will cause a kickout. Next, run the line down next to the shank. Curl it back round so that you develop a look that resembles a Uni knot.
Run the wraps inside the loop round the parallel line and shank. It is highly important to manage wraps as you go. If you can, get not less than five wraps. To pull the mainline and tighten the knot, you’ll have to readjust the hold of the knot. Work your wraps evenly together without any crossing.
Check out this video on how to tie a fishing hook.
#7: The Rapala Loop Knot
Loops knots are an excellent alternative for the top water baits that lack split rings. Users can allow their baits to move sideways more with this kind of a knot. The Rapala knot is popular when it comes to loop knots for the bigger lures. With this knot, it is very easy to manage how tiny your loop is.
Via: www.lovetheoutdoors.com
To Tie:
The primary thing you need to do is tie a ½ knot roughly 3 inches up from the tag end. Begin making your knot by passing a tag end via the eyelet and then through the half knot you made. Next, wrap up the line three to five times. Finally, pass the tag end right via the half hitch. Gradually cinch your wraps together with half hitch in order to secure the knot.
Learn about the Rapala Loop Knot here.
#8: The Eugine Slip Knot
The Eugine Slip knot is simple, strong, and quick.
To Tie:
Begin by passing a tag end via the eyelet and then run it parallel to your mainline. Double it back down in order to form a big loop. Wrap the double lined loop round the mainline five times. Grab the tag end as you pass it through the loop’s top. Slowly pull your moistened knot by pulling tag end. Next, pull both the mainline and tag end together and aftewards the only the mainline in order to tighten it.
Notes: When pulling this knot tight, it is common to hear an infamous click. That is actually, what you should be looking forward to know that you are tying it correctly.
Here is the video you need to watch to learn more about tying the Eugine slipknot.
#9: The Alberto Knot
The Alberto knot is a modified version of the Albright knot. It brings with it a double cinching protection with a tiny knot.
To Tie:
Begin by doubling a fluorocarbon line as you pinch it between the right hand (for left handlers). Pass your brain via the loop, which you’ve pinched between your fluoro fingers. Start wrapping the braid’s tag end around two fluorocarbon lines.
Make sure you have ample tag for wrapping down eight times and then back up ten times. Therefore, you’ll wrap down eight times and then reposition your drip, then finally wrap ten times. For you to be able to finalize the knot, make sure you pass your tag end back via the fluoro loop just the way it came it. This way, both braid ends will come in the same loop direction.
Grab both the main line and tag end of fluoro in one hand, and mainline and tag end of the braid in another hand. Pull them snugly till the knot cinches down. Pull both mainlines as you secure the knot. Test its strength as well as sippage prior to trimming tag ends on either side.
Here's the video to watch to learn more about the Alberto knot.
#10: The Two-Uni Join Knot
Double Uni is the name that most anglers use to commonly refer to this knot. What is confusing is the fact that you can double your line as well as tie your uni knot using just using a single line in order to gain better knot strength whenever you tie hooks/lures to your line. Therefore, to make it simpler, we call this
To Tie
Begin by overlapping the tag end of a braid and fluorocarbon several inches. Next, loop the braid as you tie just a simple uni knot through wrapping the line four times in the loop you have just made. To hold your knot in place, pull the braid tag end tightly. Do this as you make a loop with the fluorocarbon together with the braided line.
Next, wrap the fluorocarbon around your braid and wrap it four times inside the fluoro loop. Slowly pull your fluorocarbon tag end as you snug the knot down. Next, pull every main line in order to slide together the two knots. Firmly pull on every tag end again and pull firmly again on either mainline in order to finalize the knot.
#11: The Yucatan Knot
This is another two-line-joining knot. As much as it is not an easy knot to tie, it surely makes an excellent connection between lines of different diameters and materials.
To Tie
What you need to do is take the smaller diameter line like braid and then double it over. After that, start to wrap it round the bigger diameter line like the fluorocarbon leader six times. After doing that, hold your loop as you pass the leader tag via the loop close to the end of wraps. Moisten and snug your knot by slowly pulling on tag ends as well as mainlines all together. Be careful not to allow the braided tag end slip via the knot.
Check out this video on how to tie the Yucatan knot.
#12: The J-Knot
The J-knot requires you to cut the length of the leader off prior to tying it. This is because the whole leader must pass via the knot as you tie it.
To Tie
Begin by passing the lines tag ends that are parallel to one another several inches. Grab both lines, tie just a simple knot, and pull the whole leader via the complete knot. Grab the whole leader as well as your tag end of the main line. Overlap them right back to your half hitch. Finally, loop the tag end and leader via the knot one more time as you pull the tag end and leader completely via the knot. After moistening, pull every line simultaneously in order to cinch the knot.
Check this video on how to tie the J-Knot.
#13: The Double-Line Unit Knot
This is another variation of the impressive uni knot. It entails doubling the line and then tying a uni using a double line. It gives users more knot coverage on both the hook and lure as well as making a stronger knot. However, it is very easy to get wraps messed up when tying this knot. Therefore, you must take great care in order to slide your wraps together evenly as you tighten the knot.
To Tie
Double the line and pinch it together in order to make it easy to pass through the loop. Next, pass your doubled line via the eyelet. Bring it up several inches as you loop it way back down. Grab your doubled line sets together with your doubled tag end separately in order to wrap your pinched double end via the loop you’ve just made. Loop it through four to seven times depending on the line diameter. Bring it out through the top of main line.
Finally, pull moistened lines slowly by the loop first as you take care of bunching or crossing cases. After that, pull your main line as well as tag end together in order to slide wraps down the eyelet. To tighten your wraps, pull your tag end as well as loop. Finally pull your main line in order to tighten the knot.
Check this video on how to tie the Double-line Unit knot.
#14: The Double-Line San Diego Jam Fishing Knot
With this fishing knot, you begin just like the regular Jam Knot, only that this time round, make sure you first double your line.
To Tie
Double the line as you
Next, moisten the lines as well as the loop, mainline and tag all together in order to tighten the knot. Pull the loop in order to tighten the wraps. Pull the
Check this video on how to tie the Double-Line San Diego Jam Fishing Knot.
#15: The Arbor Knot
The Arbor knot is an excellent line for tying monofilament and fluorocarbon to fishing reels. It is also handy when it comes to tying off the filler spools for storage without the need for rubber bands or holding things such as notches or tape in the spool.
To Tie on Reel
Wrap your line around a spool. Tie a ½ hitch
To Tie on Filler Spool
Take the line tag end on the spool. With the other hand, run your finger beneath the line on the spool. Follow it around till you are back
Check this video on how to tie the Arbor Knot.
#16: The Blood Knot
The Blood Knot is highly valuable to fishermen for linking two monofilament lines. It is common with fishermen using leaders such as fly anglers. It is not only easy to tie but also fast. The knot offers a tiny connection. When properly tied, it can never pull loose regardless of how close the tag ends are clipped.
To Tie:
Cross two lines and then wrap one line 3 times round the other. Next, place the line end via the loop that has been formed by two lines. Turn your other line
Check this video on how to tie the Blood Knot.
#17: The Double Surgeon’s Loop Knot
Similar to the blood knot, this knot is handy whenever you want to attach 2 different fishing line pieces. Dissimilar to the blood knot, the knot is optimal for fastening together any two fishing lines of distinct diameters. Tying it is very easy and highly important for any angler. This is especially true if you are the kind that keeps pieces and bits of your old fishing lines lying around to use in future.
To Tie
Fold over the line’s end in order to form a double line. After that, tie a simple, single overhead knot. Pass your loop via the hole inside the overhead knot just one more time. Finally, moisten the knot and do not forget to tighten.
Check this video on how to tie the Surgeon’s Knot.
#18: The Home Rhode Loop Knot
This knot is common with anglers that use crankbaits. It allows spoons, and spoons or any lure to have the best action. This fishing knot forms a loop via a lure’s eye so that it swims more freely compared to when it was tied snugly on it. Actually, the loop formed by the knot can often make a diving plug run true.
You can always make this knot with a light or heavy line. Forming the knot carefully is highly important. However, when done properly, you can rest assured that it’s extremely strong. Even though it is tied normally using monofilament, it works excellently when tied with heavy shock leaders.
To Tie
Tie just a simple knot roughly 4 inches from the line’s end. Push the line’s end via the hook eye and then back via the overhand knot’s center. Next, make another simple overhand knot just around the standing part of your line. After tightening it, the 2 overhand knots should jam and slide together as they meet right at the middle of 2 loose overhand knots that form a loop.
At the exact location where the 2nd overhand is positioned, is what determined the knot’s loop size. For the big loop knot, form a second overhand knot that’s well up the standing part of a line. For the small loop knot, make the 2nd overhand knot to be close to the 1st overhand knot.
Check this video on how to tie the Home Rhode Loop knot.
#19: Snelling a Hook Knot
Snelling a hook was at one point in time necessary since many hooks didn’t have eyes. Nonetheless, some expert anglers remain incisive in Snelling their hooks since they believe it makes a strong connection. These knots are commonly used in the fishing of natural baits like the live shiners for the
To Tie
To tie this knot, thread your leader via a hook eye and lay it beside the hook shank. Next, pull roughly 6 inches of your leader via the hook eye and then form a loop beneath the hook shank. After that, hold the line close to its end tight, parallel to hook shank while at the same time wrapping line loops over the whole hook. Ensure the loop’s line that is close to hook eye forms a series of coils. Slowly pull the standing part of line after forming 6 tight coils on hook shank. Doing so will bring the rear loop via the coil as well as tightens the knot.
Check this video on how to tie the Snelling a Hook knot.
#20: Spider Hitch Knot
A good number of fishermen utilize Spider Hitch rather than a Bimini Twist. This is especially true when they need a knot that perfectly doubles their line for an improved strength. This knot is highly popular in saltwater. However, it boasts numerous applications when it comes to freshwater too. Users can quickly tie. The knot has superb knot strength with monofilament, modern braided lines as well fluorocarbon.
You can effortlessly tie this knot to form an effective double line that has twice the strength of single strand. Moreover, it normally doubles a light line’s diameter whenever connecting to heavy leader thus making for an effortlessly tied connection.
To Tie
The primary step in tying this knot is doubling the line and then putting a tiny reverse loop in it. Next, reverse your reverse loop using your forefinger and thumb. Wrap your doubled line 5 times around your thumb as well as the reverse loop. Gradually pull the big loop so that your line unwinds off your thumb. In order to make a tiny and properly formed
Check this video on how to tie the Spider Hitch knot.
Conclusion
Novice anglers hit the water only armed with information or the knowledge of one knot - an overhand knot. However, real or experienced anglers would not dare venture out with limited arsenal as such. The truth is that different angling situations call for use of different knots. Knots needed for effectively tying a fishing line to hooks are completely different from those needed to link two line sections together.
Having spent quite some time quizzing professional guides, expert anglers, as well as avid fishermen, it is true to say that the above fishing knots are not only the best, but also the most used and commonly mentioned knots among different fishing groups.
The truth is that a fishing line is not magic. Do not believe what the commercials tell you. A fishing line wears out, builds up friction, gets nicked, gets scrapped, stretched, cut etc. Therefore, retying is highly important. However, the most important thing is tying a great knot to start with. As you delve into the above knots, you might also want to check out these tips on tying great fishing knots.
Leave a Reply