Fly fishers evolve with time. There is no doubt about that. Most likely, it seems we tend to begin due to the visual attractiveness of casting, then it is about the fish numbers and later, it is about the trophy. The truth is that during this journey, you get to spend plenty of money. Guides, leader, line, flies, reels, rods, trips and then … more flies, reels, fly rods … and on and on and on …
This easy to read and understand guide aims to show you how to build a fly rod, and save substantial cash while at it … how about that!!
More...
For sure, building a fly rod can be tricky for many. However, it is possible … very much possible.
Anytime you hook to the premier fish with your own built fly rod, the memories can be priceless. Nevertheless, it is prudent to first buy a medium fast-action rod and then learn the basics. Ultimately, you may find that tossing a fly is not for you.
Generally, constructing a fly rod comprises of four major parts:
- I. Choosing a fly rod and assembling the tools/components
- II. Finding the spine and then attaching handle and reel seat
- III. Spacing the guides, tip top and then wrapping
- IV. Finishing
What skills are needed
Patience is the primary skill you need. For most steps, you’ll be able to ‘dry fit’ prior to permanently attaching. Basically, if you have some patience and have tried some flies, then you are good to go …
Getting acquainted with the fly rod lingo and components
Fly rod blank (length and weight)
The backbone of your fly rod is what is known as the fly rod blank.
In our case, we shall construct a fly rod from a graphite blank. These blanks are made by carefully rolling a graphite sheet, impregnated with resin around its form. The form goes by the name mandrel. It is tapered in such a way to vary the rod’s flexibility.
Weight
Weight is the term used to define a fly line and fly rod. A fly line weight is usually determined by weighing its first thirty feet. The weight combination of a fly line and rod is what determines how heavy/large a fly can be casted.
General weight guide
1 wt - 3 wt – The small trout and bluegill
4 wt - 5 wt – The small bass and trout
The 5 wt rods are excellent all round rods for the most stream fishing across the USA.
6 wt - 8 wt – The bass, striper, steelhead and large trout
8 wt and above – This is surely big boy territory -- The salmon, musky, tarpon
Fly rod length
The type of fishing you intend to do and the environment are basically the two things that determine the length of your fly rod. Short rods work brilliantly when the fishing is restricted to streams with little casting rooms. Longer rods are handy when you want to cast long distances or increase the line’s control.
A good number of rods are 8’ 6” to 9’ in terms of length.
Action
Fly rods have characteristic by the term action. Terminologies such as slow action, fast action, and medium action are commonly used. The rod action is simply a combination of the changes within the graphite material stiffness. The action is highly beneficial to different fly fishing types.
Ferrule
Via http://howtobuildaflyrod.com/
Via http://howtobuildaflyrod.com/
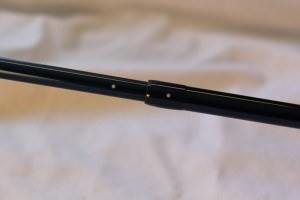
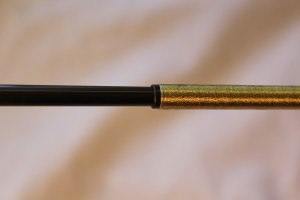
The ferrule simply refers to the joint between two pieces of a rod blank.
Spline
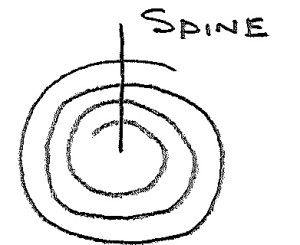
Wrapped graphite fiber makes spline/spine ( Via http://howtobuildaflyrod.com/ )
Since rolling the graphite sheet onto itself makes the blank, the spline is simply the thickest overlapping section.
Reel Seat
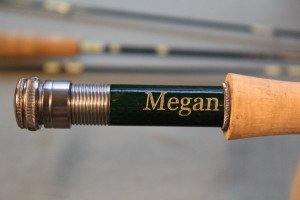
Via http://howtobuildaflyrod.com/
The reel seat refers to the hardware that links the rod and the reel. It can be made of anodizes aluminum or wood. One of the most effective ways of dressing up your fly rod is through the hardware.
Grip or handle
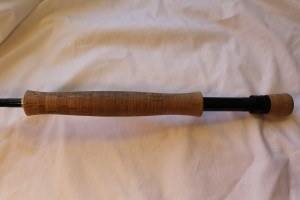
Via http://howtobuildaflyrod.com/
The grip or handle is normally made of cork. It is another area that you can use to customize your fly rod. You can use exotic materials such as beautiful woods and shed antlers.
Fighting Butt
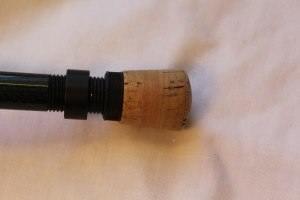
Via http://howtobuildaflyrod.com/
Beginning at roughly 7 weight rods, you can add a fighting butt. It is a tiny extension on your rod’s reel seat that allows you push the rod butt comfortably into the belly, in order to leverage as well as reel a big fish.
Tip Top and Guides
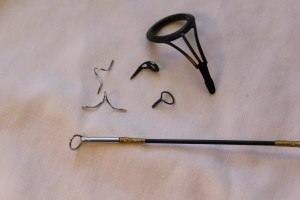
These are rings that are added to the rod in order to firmly hold the line. The tiny rings are usually in all imaginable sizes and materials.
Hook keeper
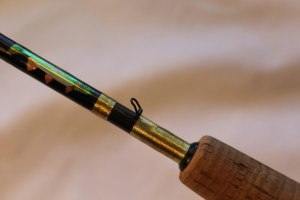
Via http://howtobuildaflyrod.com/
A hook keeper is a tiny loop that is added to the rod blank close to the grip in order to hold your fly. They come in three or two different styles. A hook keeper is optional whenever you are building a fly rod.
Winding check
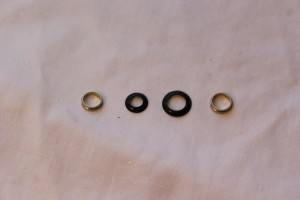
Via http://howtobuildaflyrod.com/
A winding check is a decorative ring that pretties up all the transitions from your grip to rod blank. You must install it immediately after your grip gets glued on. After installing the hook keeper, adding it after is impossible.
Thread
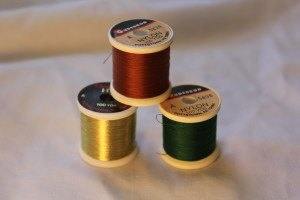
Via http://howtobuildaflyrod.com/
You must never use any spool laying thread around your house. A winding thread is in an array of colors. You should find something, which you fancy.
Epoxy
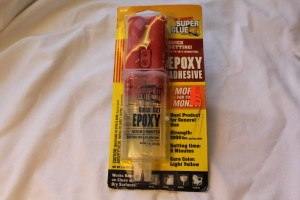
Via http://howtobuildaflyrod.com/
Epoxy refers to an adhesive that reacts whenever combines. The reaction ensures it becomes inert and hardens. When building a fly rod, you’ll use the two type epoxy, gluing and finishing. You must mix the Epoxy based on instructions. It will not harden if you vary the amount from directions.
Wrapping stand
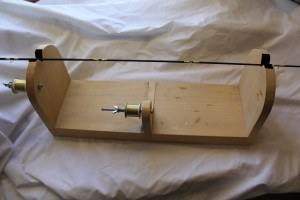
Via http://howtobuildaflyrod.com/
This is a simple jig or tool that cradles your rod blank and then dispenses the thread with some little tension. A wrapping stand can be just simple like a phone book or v notches or as sophisticated as variable speed motorized with multiple thread stations, guides and gearing wheels with foot controls.
Drying motor
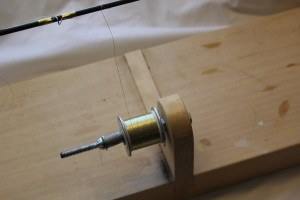
Via http://howtobuildaflyrod.com/
This refers to a simple tool, which rotates the rod blank while waiting for the epoxy finish to harden. Since it hardens with time, if your rod remains in a single position for long, the epoxy will surely run and drip.
Having learnt the different terms that are important in the making of a fly rod, it is important to know how much it will cost you to build one:
How Much Does It Cost To Build a Fly Rod
Minimum cost
For less than $90.00, you can purchase the following ‘pretty good quality’ components:
- Brushes
- Epoxy
- Finish
- Winding check
- Tip top
- Hook keeper
- Grip
- Guides
- 4 weight,
two piece kit with a reel seat
Maximum
The sky is surely the limit when it comes to maximum spending. Custom reel seats can cost over $175, blanks over $500 while the highest quality hardware, grips, and guides can add another
The retail value of a fly rod can be well above $1,500.
How Long Will It Take Me to Build a Fly Rod
You should plan for ten to fourteen hours that are spread over five days. However, for the experienced folks, it can take four to five hours spread over two to three days.
You need to spread the project over days since the epoxy glue has to chemically react in order to harden. You can’t rush the process. Additionally, you really do not want to rush such a project. Taking breaks between different steps is highly advisable. It helps you think through the upcoming steps.
Conclusion
Are you into fly fishing? If yes, then building a fly rod will surely be a walk in the park. As indicated above, patience will surely be of utmost importance. This is a project that does not need to be rushed in any way, lest the results will be disastrous. Before you start on the project, it is prudent to ensure that you not only have the time needed, but also the materials required -- all materials.
The above is just a simple and basic guide that even beginners can have an easy time following through. Nonetheless, it does not include information for all possible scenarios. The good part or best news is that, thousands of anglers, even inexperienced ones, have managed to come up with their own fly rods based on the steps discussed above. If you feel that they are somewhat complicated, you can always ask for help from the experienced guys. Better still, why not check out this much simplified version of a guide to help you piece everything discussed above.
If you still have challenges in any section or with any of the parts mentioned above, feel free to let us know. We are here to answer your concerns every day. Have you been successful at making your own fly rod. Also, let us know in the comments section.
Leave a Reply