Rain, dew, or sudden downpour can slip inside any tent or shelter where there are holes or tears; big or small, on the material or in the seams. Whether your tarp or tent is fully waterproof and seam-sealed, unsealed, or factory-taped, it may eventually be necessary for you to maintain your tent to keep it in good shape and enhance its resistance against the elements.
Luckily, we reviewed 5 of the best tent seam sealer in the market today for you. Also included in this post is the seam-sealing process which is pretty straight-forward and easy. You can easily do the entire seam-sealing process by yourself.
More...
I. Some Important Things and Questions to Consider
Does a factory-taped seam indicate that my shelter is seam sealed?
Not necessarily. The latest tents often have factory-taped seams. What this means is that a double stitch was done on the waterproofing material between the material’s seams. Factory-taped seams are generally water-resistant and capable of holding up just fine compared to those without seam sealing, but it’s not like fully waterproof seam sealing.
I just bought a new tent. Why it isn’t already taped or seam sealed?
While there are manufacturers that have their tents already seam sealed, some don’t do it because of the time and costs involved. A more affordable option would be to seam seal your tent yourself. Some companies can provide you that option for an extra charge.
Tents manufactured with silicone-treated nylon aren’t factory-taped because seam tapes don’t stick to the shelter’s material.
Why is it necessary to seam seal a tent?

Before you make any hasty conclusions, it is best to check with your item’s manufacturer first since they would likely have guidelines on where and how to add the sealant according to the materials your shelter is made of.
If your tent is neither taped nor sealed, then it would be necessary to seal them. Do this on a dry, warm day before getting on the trails.
If your shelter comes with factory-taped seams, then there’s no need for you to seal it. Your tent should be water-resistant, although you can always test it under the rain or with a sprinkler if you want to make sure.
If you’re going to use your tent under wet conditions on a regular basis, then you should consider seam sealing. Adding a layer of sealant will add maximum waterproofness to your shelter.
If your shelter is seam-sealed, then it is not necessary for you to seam seal it. However, it is important that you test the material’s waterproofing capabilities with a sprinkler. Regular inspections and seam sealing and maintenance are crucial if you’re always using your tent.
There are so many seam sealants on the market today. Can I buy just any sealant for my tent?
No. Certain sealants may be made for certain fabrics. Figure out the type of material your shelter is made of (silnylon vs. nylon, for instance) and follow the manufacturer’s guidelines. You should use the sealant that’s recommended by the manufacturer for your shelter’s fabric.
II. Our 5 Best Tent Seam Sealer Review
Product Name | Image | Quality | Our Rating |
|---|---|---|---|
A + | |||
A + | |||
A + | |||
A - | |||
A + |
1. Texsport Polyurethane Waterproof Seam Sealer

Via: Amazon.com
Texport Polyurethane Waterproof Seam Sealer is among the top 5 choices for seam sealers. This a polyurethane-made sealant manufactured explicitly for synthetic tents.
Usually, synthetic tents do not have sufficiently taped or sealed seams because most of them are manufactured to be utilized for ultra-light backpacking. The odds are that you ought to check a new silnylon tent before heading to your destination and lay down the seam sealer to be safe at least.
These materials are of excellent quality but normal sealants just will not still. So if you have any synthetic fabric, you will have to use Texport Polyurethane for a good stick. Besides the seams on tents, this sealant can also be utilized on any other gear. It is sufficiently strong to be applied on minor repairs too. This item should be enough to seal seams thoroughly on a two-person tent.
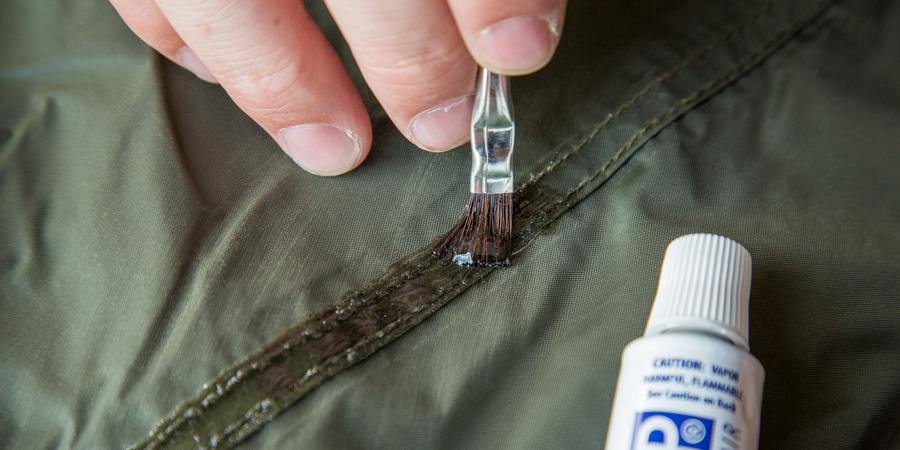
Apply it by drawing a bead just as you would with most sealers. This product includes a tiny brush, allowing you to even out the line while blending it.
2. Coleman two-oz. Waterproof Seam Sealer

Via: Amazon.com
If you are having trouble looking for a reliable seal sealer yet do not have access to an outdoor gear sealer, the Coleman Waterproof Seam Sealer is another excellent choice. Products made by Coleman are more likely sold in stores such as K-Mart or Walmart, even though these stores have a small camping section.
Coleman is a urethane-based product and is known for its fast-dry feature while still maintaining the flexibility of the tent. Because of its ingredients, the product is not recommended for use on silicone-infused or silnylon tents, so buy this product only if your tent is constructed from other laminate or synthetic material.
This sealer is packed in a large bottle and includes a brush, making the application easy while helping to prevent large globs of sealer. To those who haven’t resealed a tent before may find Coleman easier for them because of its smooth application.
Coleman comes in a two-oz. It may not be one of those award-winning and popular brands, but it will undoubtedly keep you dry as soon as applied.
Once you have chosen a sealant, applied it on your tent, and finally, waited the required dry time, you ought to test your tent before heading to your camping site. One way to it is to place your place next to a sprinkler and wet it to imitate rain.
Attempt to aim the sprinkler like how the rain falls on every portion of the tent. You also need to examine your tent for longer periods, approximately three hours or more to make certain that the seals are tight. A loose seal can sometimes leak for a few hours, so do not spray your tent using a hose for only a couple of minutes, not noticing a leak and assume you are safe.
3. Seam Grip Seam Sealer by Gear Aid

Via: Amazon.com
Seam Grip is one of the most preferred and sought-after outdoor gear or tent seam sealers available today. If you truly want a proven and tested sealer that’s easy to use, easy to find, and very reliable when used right, then Seam Grip Seam Sealer is an evident choice. In fact, it was even awarded the Editors’ Choice Gold Award for Backpacker Magazine.
This product comes in an easy squeeze tube. Just get the beads started and gradually apply a sealer across the seam to lay down the line.
Gear Aid recommends using this product on the inside portion of the seam, although a lot of customers have been fortunate when their tent’s design forced them to use the product from the outside. The manufacturer also suggests that you wipe the seams to be sealed using isopropyl alcohol to guarantee the best application.
Naturally, this seam sealer is most often used for sealing tents, but it is adequately versatile for other purposes. Use it seal gloves, backpacks, and similar kinds of gear that are often exposed to water. Moreover, its goopy consistency is thick enough that it can be used to fix small tears, holes, or punctures in a tent.
A one-oz. tube is enough for resealing the floor and rainfly on an average two-person tent. You can buy the product in basically any outdoor store.
4. McNett Seam Grip

Via: Amazon.com
McNett Corporation’s Seam Grip is a dynamic urethane sealer which is two products combined into one. All it takes is one application to seal seam and repair tears permanently and holes of different items; especially tents.
Seam grip is abrasion resistant, waterproof and stretchable; it can stretch to over 100%. You can utilize a precleaner to give accelerator and adhesion and cut the drying time by many hours (24 to 2 hrs).
The item repairs adhesive and urethane-based seam sealant. It seals seams, repair tears, rips and holes on outdoor gear permanently. It’s so effective became the Backpacker Magazine’s Editor’s Choice Gold Winner.
Its dynamic, waterproof formula makes it invulnerable to extreme heat and cold. Using on synthetic and natural fabrics is safe.
5. Gear Aid Sil Net Silicone Seam Sealer

Via: Amazon.com
You have an ultralight tent to provide shelter and protection during the rainy camping trips, but tree branches fall to tear a hole on the fly and the rain gets inside. Well, you can seal those nasty seams and get back to drying with Gear Aid’s Sil Net Silicone Seam Sealer.
The manufacturers designed the sealer especially for silicone-based fabrics found in light tents, backpacks, tarps and even rain jackets. The sealant’s formula is user-friendly and highly resistant to extreme temperatures.
The product is very flexible. Once applied, the elastic seal can stretch and flex with gear. The sturdy silicone rubber adhesive attaches permanently to the silicone-based fabrics making it durable for use. It’s a water-resistant sealant that lasts long and is invulnerable to extreme cold and heat
It offers a water-tight seal which doesn’t crack or peel in time.
III. How to Utilize Sealant on Your Tent

Via: www.rei.com
Step two. Determine which portion of the material to seal. Before slathering on any sealant, read the instructions carefully to determine the portion of the seam to treat. Several sealants require that you apply it on the interior surface of the tent floor or rainfly, while others require that you apply it on the exterior, the original coating.
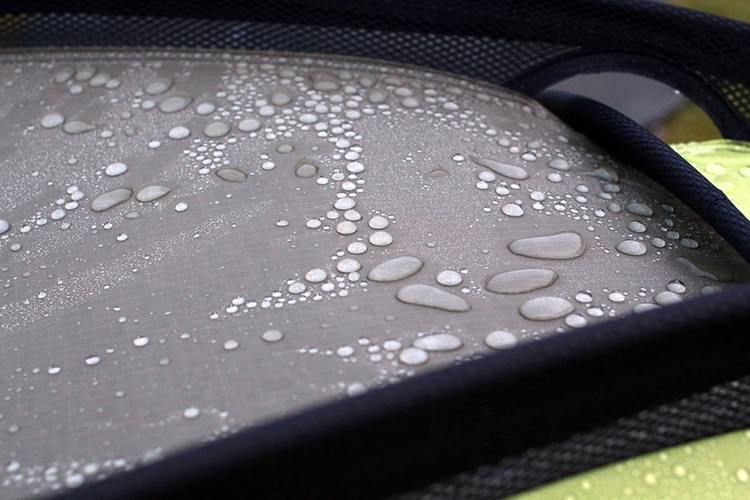
To locate the original waterproof coating, find the surface that has a shiny finish or sprinkle water on it. Often, the coated portion beads up and the uncoated one puddles.
Step three. Prepare the seams. Using a toothbrush, get rid of any peeling offcuts of the old sealant, then swab the seams clean using an isopropyl alcohol-dipped cloth. Allow a couple of minutes for the seams to dry, next pitch the tent in a ventilated area, and affix the rainfly with the to-be-coated surface facing outward.
Tightening the fly will stretch the seam, which allows for improved sealant penetration and for fast-drying time. To reach awkward places on the tent floor, you should turn it inside out.
Step four. With long, uniform strokes, apply a big seam sealant coat over your selected seams. Wait for an hour for the drying process, and repeat the process to cover other gaps.
Step five. As soon as the seam goop dries, place the tent under the sprinkler for three hours to check for any leaks. Allow it to dry and reapply seam sealant if required.
Check out this video to get a clear picture of how tent seam sealing works:
Final Words
Every type of tent requires some weather-proofing. New models need seam sealing, rain-flies can get punctures and require patches, and floors require fresh waterproof coatings. Even costly four-season covers can get cracks in the armors, that’s why you, like a tent owner, ought to set aside one hour or more every spring for a few preventive maintenances.
I recommend any of the best seam sealers we reviewed in this post. Remember to match your sealant with the type of material your shelter has along with the manufacturer’s recommendations.
Learn more about how to choose the 5 Best Tent Stakes – Reviews and other Tips , The Best Tent Brands Of 2018: A Buyer’s Guide You Need To Know . By the way, have a look at our A Complete Guide To Buy The Best Pop Up Canopy .
Leave a Reply